Learn How to Create New Post
After you read through this short tutorial, you’ll be able to note up any changes in your crop in no time. To begin, login to your site admin panel and go to Posts -> Add New.

On this page you will see the posts editor. The most important parts of this page are:
- Post Title – enter the title of your note in this field.
- Post Content – you can use the WordPress WYSIWYG editor to add the actual content of your post. Note that it has two tabs – Visual (use the editor to format your text) and Text (add your HTML code directly). you can use the editor to add the actual content of your note. The editor works similar to Microsoft’s Word, you can format thesame way the text of your post as you would do in Microsoft Office. Just click on the symbols to changethe look of your letters, content.

Add Images and Media
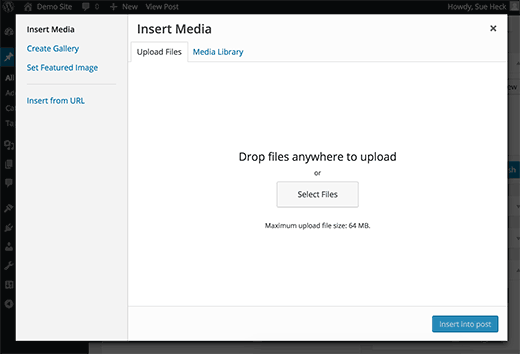
Between the title and content fields, there is a large Add Media button. You will need to click on it when you want to upload an image or any other media to your post. This will launch the media uploader in a popup window.

Simply click on the select files button to upload images or any other media to your WordPress site. You can also create image galleries from uploaded files.
Before you would finish your post, you can choose in which category you would like to save it on the left side of the screen. With this option you can organise your notes and follow easier the changes in your crop.
Once you enter the content of yournote, you need to Publish it. Publishing brings your post to your actual website.

That’s it! You can now go to the front page of your site to check out the newly created note.
